As our students create more and more digital products—blog posts, videos, podcasts, e-books—they should be using images to enhance them. Images grab an audience’s attention, they can illustrate key concepts, set a certain tone, and present a more complete understanding of the ideas you’re putting out there.
And the internet is absolutely teeming with images students can grab and use in a matter of seconds. But in most cases, they SHOULD NOT GRAB. Despite the fact that these images are easy to get, using them may be illegal.
Does this Matter at School?
Is legal image use really a big deal with school projects? If our students are just using images to enhance assignments for class, it might be easy to shrug off the technicalities, since most of these images will never be seen by audiences outside the classroom.
Two things to consider:
- Even if your students are working within a tightly monitored, password-protected, closed online environment, there’s no guarantee that the products they create will always remain private. Proud parents might share their child’s work on social media, a student might place their work in a digital portfolio for future use, and household guests might ultimately view things inside that “closed” environment. So it makes sense to operate under the assumption that all digital products could eventually become public.
- Why not prepare students for the day when these rules will carry more serious consequences? As students move out of school and into professional contexts, being trained in the proper, legal use of images will serve them well. And legal use of images is also closely tied to ethical habits and plagiarism.
So in the spirit of complying with the law and preparing the next generation to participate responsibly online, let’s review the different approaches students can take to add images to their written work, blog posts, videos, presentations, and other digital products. We’ll start with the safest, most affordable option.
Disclaimer: I am not a legal expert. My goal is to raise awareness of the complexities of online use of images and get teachers to pass on that awareness to their students. If you find inaccuracies, please point them out and I will make corrections.
Option 1: Make Your Own
If students create their own images, then they own the copyright and can use them without having to pay any money or get permission (unless the photos are of someone else…but we’ll get to that).
ILLUSTRATIONS
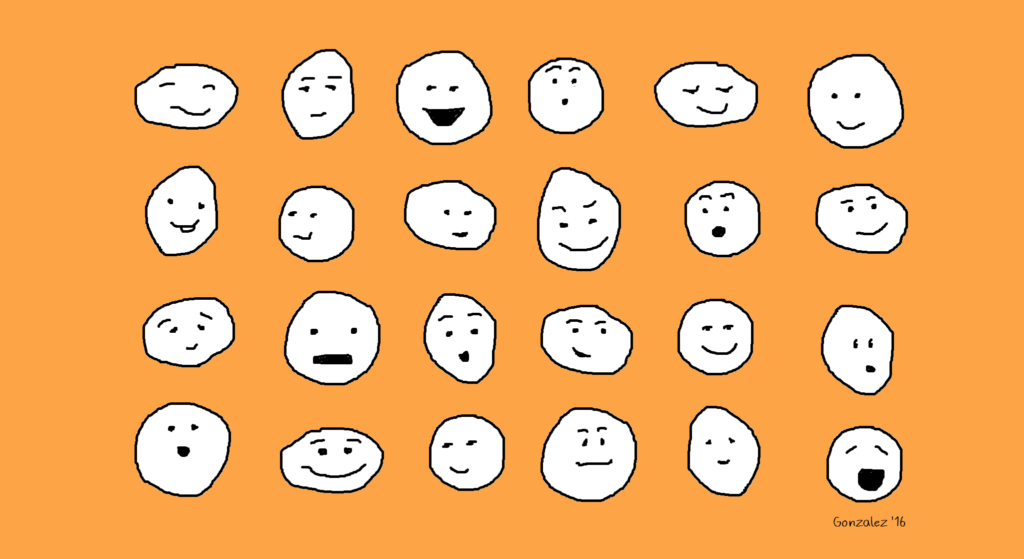
When I first started this website, I couldn’t afford to buy nice photos, and I didn’t want to use the same free ones I saw everywhere else online, so despite the fact that my artistic skills are nothing special, I just created my own doodles in MS Paint, like the one shown above. This is a great route to take, because you can get started right away, it’s free, and there’s no copyright to worry about.
Students can create their own illustrations in two ways:
- Handmade: Students can draw or paint an image on paper, create a paper collage, or even build something in 3D like a sculpture, then take a picture of it and use that photo for whatever digital product they are creating.
- Digital: Using simple programs like MS Paint for Windows, Paper by 53 for iOS devices, or web-based tools like Google Drawings, Adobe Creative Cloud Express, Canva, Autodraw, Piktochart, and Sketchpad. On any of these platforms, students can create just about any illustration they can think of, save it as a PNG file, then add it wherever they like.
PHOTOS
Students can take their own digital photos and upload them in a heartbeat, using sites like PicMonkey and Pixlr to edit or enhance them for free. When using photos they take themselves, students should keep the following rules in mind:
- When You Do NOT Need Permission
Although it’s always considerate to ask people permission before you use a photo of them online or in another public space, sometimes it’s not possible, and in these cases, it’s not legally necessary:- If you took the photo at a public event and the photo will be used for journalistic purposes (to simply describe the event, for example)
- If the person is not recognizable in the photo (their face isn’t showing, for example)
- When You DO Need Permission
Have the subject sign a photo release form in person or, if that’s not possible, have them copy the language from a photo release form into an email. If the subject is a minor (under 18 in the U.S.), you need permission from their parent or guardian.- If you’re going to use the photo for commercial purposes (to sell something) or promotional purposes (to promote a product, service, or idea), you need permission from the subject.
- If the photo was taken on private property, even if it is not the subject’s property, you must get permission from the subject to use that photo.
- If you are holding an event, like a festival, party, or concert, and you plan to take photos that you might share with the public, you should get permission from attendees. Event organizers often use crowd release forms at the point of registration: They’ll require attendees to check a box giving permission to use photos of them. Another approach is to hang up crowd release signs at the event itself. Learn more about event release forms in this post from SLR Lounge and this one from Mark Schaefer.
- When You MIGHT Need Permission
- If you are taking photos of students at school, it’s likely that the parents or guardians of those students signed a media release form at the beginning of the school year, giving the school permission to use that student’s image in various non-commercial publications throughout the year. These permissions may also extend to student photographers, as long as you are using the images for school-related projects. Students should check with their teacher and administrator to make sure.
- If the photo contains an image of a store or business logo. Some businesses have rules about using images of their facilities or that prominently feature their logo, so if you are going to be taking photos that will include any kind of business logo or store, get written permission from the business owner first.
- If the student has a job that includes taking photos, photos taken as part of the job may actually belong to the employer.
Option 2: Use Creative Commons Images
Creative Commons is an organization that has made it much easier for people to share artwork. They have established a set of licenses that artists can place on their work that automatically gives others permission to use that work in their own projects under specific terms and conditions.
A photographer, for example, might use a Creative Commons licenses on a collection of her photographs, so that anyone who finds them online can easily check the chosen license and follow the restrictions of use specified in that license.
If your students want to use images they find online, they should look for images that have Creative Commons licenses. You can learn about all of the licenses here, but the safest bet is to steer students toward pictures that have the two least restrictive licenses:
CC0: Creative Commons Zero
This is the least restrictive level, and the one students should look for first. Items marked as CC0 can be used by anyone, for any purpose without having to get permission or give credit to the artist. In other words, an image licensed with CC0 is the same copyright-wise as an image in the public domain.
CC BY: Attribution
Items with this license can be used for non-commercial OR commercial purposes, and all the user has to do is give credit to the original artist.
[Both license images above came from Creative Commons and are licensed under CC BY 4.0]
WHERE TO FIND CREATIVE COMMONS IMAGES
Free Stock Photo Sites
These fantastic sites curate free, high-quality images that are all CC0 licensed. Simply search for what you need, download the photos you like, and use them. Unfortunately, many free stock photo sites contain adult content, so unsupervised students should not use them, but if your students are working under adult supervision, they should try these sites. Here are a few good sites that don’t appear to contain inappropriate content:
StockSnap
Good Free Photos
Foodiesfeed (all food-related)
Flickr Commons
Flickr is where thousands of photographers store their photography for public display, and many of these photos have CC0 and CC BY licenses.
Photos for Class
This is a handy search engine for finding school-appropriate images. My only hesitation with recommending this site is that it automatically adds attribution to each photo. Although this could be seen as a good feature, I feel it doesn’t really teach students how to give appropriate attribution, because it does the work for them. Also, students may not always want the added black bar with the attribution information at the bottom of each image, and they may be tempted to simply crop it out, which would defeat the whole purpose.
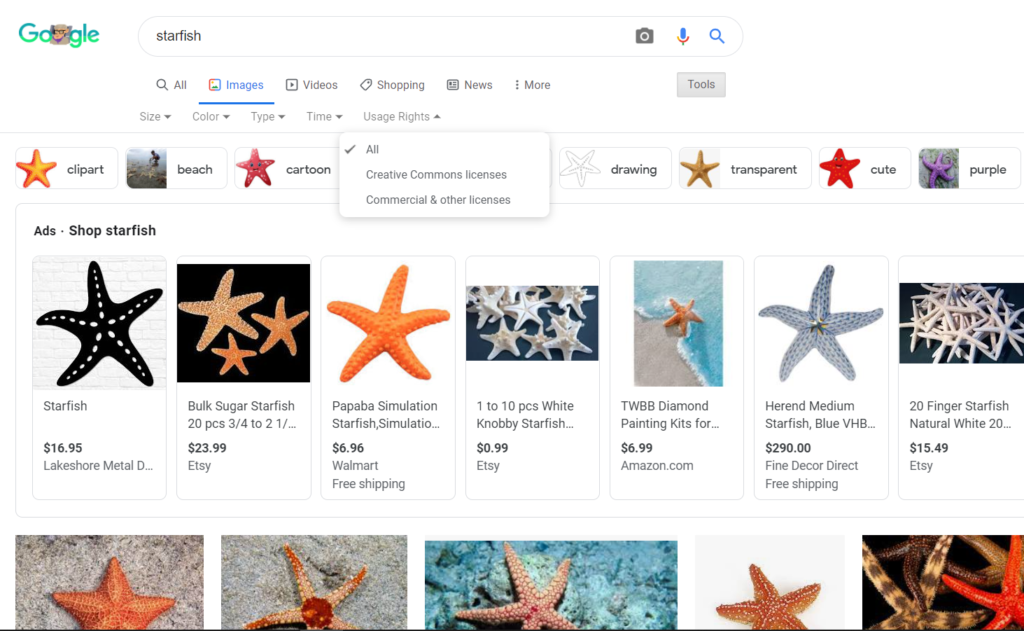
Google Image Search
Although a Google search will pull up plenty of images students don’t have permission to use, the search can be filtered so that the results only show images that are licensed for re-use. Just be sure to open up the Tools after you search, and check one of the options under “Usage rights” that will remove all of the photos that have not been labeled for some kind of reuse. Checking “Creative Commons Images” should give you images that have the least amount of restrictions.
HOW TO GIVE PROPER ATTRIBUTION
If students use an image that requires attribution, students should simply add a line of text underneath the image providing four pieces of information (Creative Commons recommends using the acronym TASL to remember these):
T = the title of the image
A = the author (or artist)
S = the source (or where it is located online)
L = the license for the image
Ideally, the attribution should be placed fairly close to the image, so that those who view it connect the information to the picture. Here are some examples of properly attributed images:
Online
If you use the image in a blog post or on a website, you can place the attribution in the caption or on a line of text below the image:
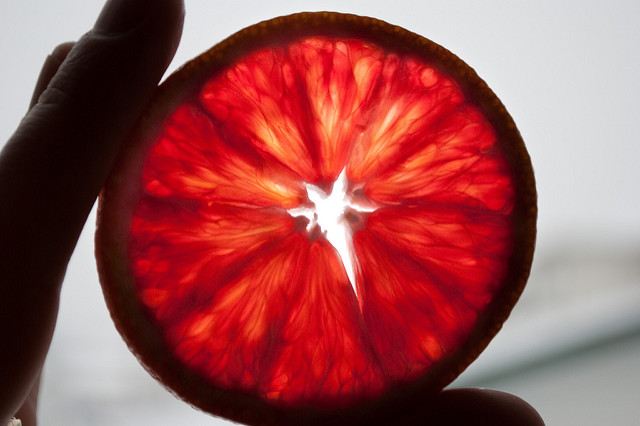
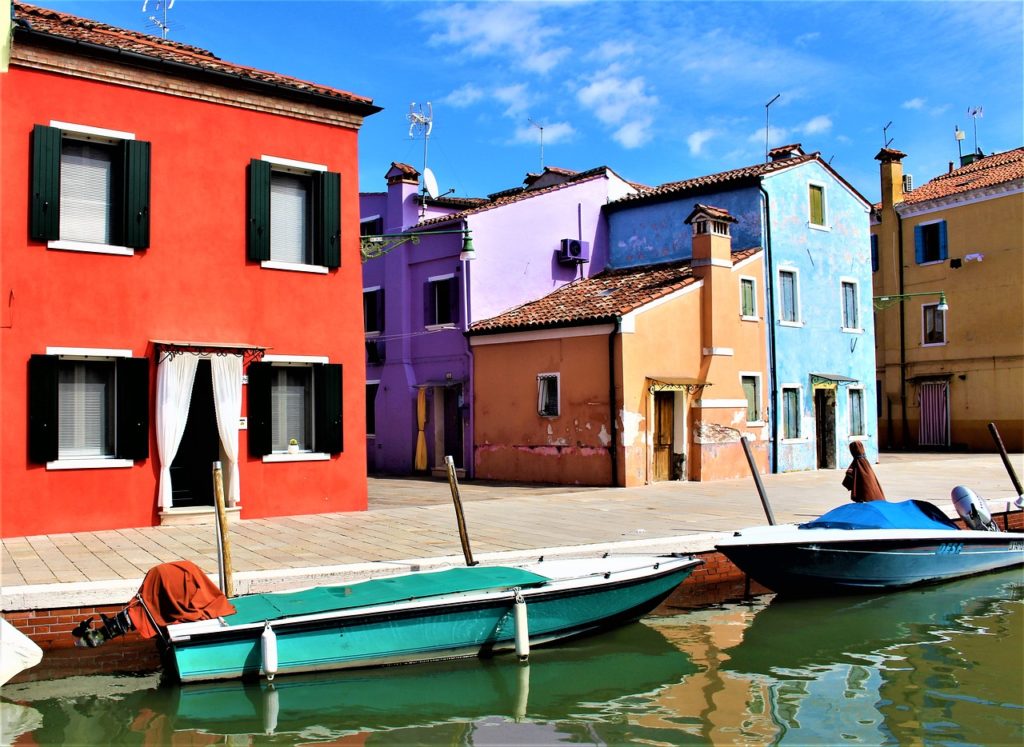
Blood Orange Shine by Derek Gavey is licensed under CC BY 2.0
In the above attribution, I included the title, “Blood Orange Shine,” the name of the author, Derek Gavey, and the code for the license. Because the image will be displayed online, I can include the location by just hyperlinking the title to URL of the site where the image is stored. I can also hyperlink the author’s name to his page on Flickr, the photo sharing site where the photographer stores his photos, and the name of the license to the license page on the Creative Commons website.
In Print
Because print publications don’t allow hyperlinking, I would need to add the URL information to the attribution:
Blood Orange Shine (https://www.flickr.com/photos/24931020@N02/14995800960/) by Derek Gavey is licensed under CC BY 2.0 (https://creativecommons.org/licenses/by/2.0/)
If doing this right by the photo would make my product look less attractive, I can add the photo credit to the bottom of the page or on a page of photo credits.
In a Video or Slide Presentation
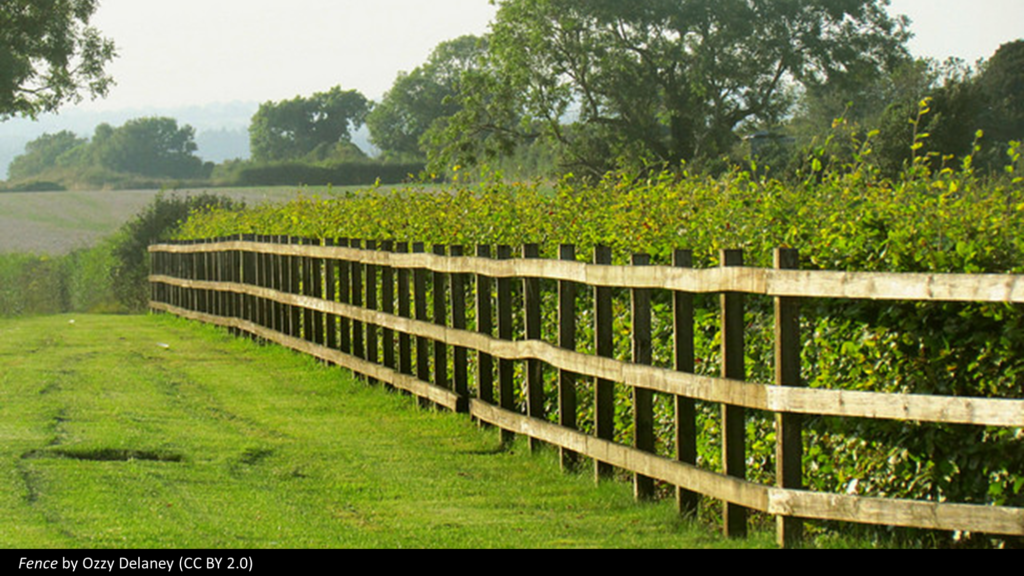
Attribution can be placed in small print right on the slide or frame where the image appears. Because giving full attribution, including URLs, would take up a lot of space and could interfere with the enjoyment of the image, one solution is to place an abbreviated attribution where the image appears (giving the title, author, and license code), then add full credits on a slide or frame at the end.
Here’s what an on-slide attribution could look like, using a simple black rectangle at the bottom with a white-font text box on top of it:
And here is what the photo credits page might look like at the end of the presentation or video:
Option 3: Buy Images
Although it’s not necessarily within most students’ budgets, they do have the option to actually purchase high-quality stock photography and illustrations. When making these purchases, students should read the licensing agreements carefully: In general, the more widely a user plans to distribute the product, the more the image will cost.
- On graphic design sites like Canva, where users can create their own designs with drawing tools and free images, there’s also the option to buy photos and illustrations to use in a single project for as little as $1. If the student wants to use the image in multiple projects, the fee for a single image can go as high as $100. Learn more about Canva licensing here.
- Other sites, like iStock, sell the images without the graphic design tools. These images can be quite expensive depending on how they are going to be used and distributed. Learn more about iStock licenses here.

Don’t Make This Rookie Mistake!
When doing general searches for images, paid items will come up in the results. The way to identify a paid image is if it has a watermark: a translucent design that covers the image but doesn’t prevent you from seeing the picture behind it.
These watermarks are only removed after someone actually pays for the image, but it is possible to download a watermarked image, and people will sometimes do this without realizing that they are basically stealing the image AND broadcasting that fact to the world.
Teach your students not to do this.
Making a Good Effort
With all of this said, using images correctly can be an inexact science: Sometimes you can’t always contact a person for permission. Sometimes it’s nearly impossible to find the name of a photographer. The best rule of thumb is to make a good effort to give credit where it’s due and ask for permission as much as possible. If we can build these habits in our students from an early age, we will be helping to make the internet a more respectful and cooperative place.
Want a Ready-Made Lesson on Image Use?
I’ve pulled the concepts from this post into a ready-to-use lesson you can teach tomorrow. Using Images Correctly includes a beautifully designed PowerPoint (also available in Google Slides), two student handouts that summarize the key points, and a Team Challenge students can take to test their knowledge of appropriate image use. Come check it out!
To Learn More
The Copyright Laws website is a great place to read more about these issues. They even have a course you can take on legally using images online.
All of the images in this post that have no attribution are licensed by CC0 or were created by the author.
Join my mailing list and get weekly tips, tools, and inspiration—in quick, bite-sized packages—all geared toward making your teaching more effective and fun. You’ll get access to my members-only library of free downloads, including 20 Ways to Cut Your Grading Time in Half the e-booklet that has helped thousands of teachers save time on grading. Come on in!!

As always, your inquisitive mind leads my lesson planning! I am just introducing eDocs to students and will include your TPT photo credit slides in my presentation. Students will benefit from developing these good habits from the beginning 🙂 Thank you –
This is also an ideal lesson to use your librarian for. Your librarian can talk about the reasons why we cite sources and provide the proper way to cite materials. This lesson can also be added on or extended when talking about plagiarism, note-taking and generally locating, evaluating and using sources. It is important to note that students should also be evaluating the images they use to make sure they are accurate and reliable for whatever they are using them for.
Thank you for making the task of teaching our students about copyrights such a fun and interesting experience.
My #1 go-to site for photographs is Pixabay. All public domain, some really terrific photographs.
https://pixabay.com/
Hi Jennifer,
Thanks so much for creating this great resource. It’s certainly one I’ll be able to share with others!
We must really be on the same wavelength as I recently posted an article on a similar topic http://primarytech.global2.vic.edu.au/2017/10/09/where-to-find-free-images-for-students-and-teachers/
As a primary school teacher, one issue I find a real obstacle is that a lot of the sites to either make your own images or find Creative Commons images are 13+. In my post above I’ve listed some good options for students both over and under 13.
Sadly, I have also recently discovered the PicMonkey is no longer free. Canva and Adode Spark are still great options for 13+.
Thanks again, Jennifer. I always enjoy your work. Not only the content, but it’s always so visually pleasing and easy to read too! 🙂
~ Kathleen
@kathleen_morris
Hi Jennifer,
Thanks for sharing. You have certainly shed lights on how students are also in need of great images. We are giving away free images that students and everyone can download the image to be used in their personal/school/commercial project safely and for free. Would be cool if you could take a look and see if you would be keen to add it to the list :). We are also trying to curate public domain illustrations from the past I found the ones on fish, astronomy and botany very interesting and educating.
Tip
Hi Tip! I took a look at rawpixel.com and I am REALLY impressed with your mission to bring more diverse images to the world! (Anyone reading this: Go to their site, do a search for “girl” and check out all the variety you get back. SO much more interesting than standard stock photos.) They are beautiful! Since I am trying to encourage students to go with CC0 images, I want to mention to my readers that the licenses at rawpixel are not technically CC0, but they do allow for most of the same uses that a CC0 license would, so this would also be a good option. Just have students read the license details (click “view license”) on each photo page.
Load time is really slow on this site, but the images are worth the wait.
I used this in class and it worked really well – a lot of students are using visuals in their final presentations, so it was timely (and worked well for the two days before Thanksgiving Break.)
I also used this article to explain to them why this is important: http://www.livingfornaptime.com/starting-a-blog/blogging-mistakes-to-avoid/ In it a blogger was charged $7,500 for using an image of a pepper illegally. It fits in perfectly with your lesson.
Hi, David–I’m a Customer Experience Manager and wanted to say thank you for adding this to the discussion. Wow. And THAT’S why we have to learn and teach about this stuff! Thanks again!
Dear Jennifer,
Thank you so much for the sharing and its an eye opener for me and my teacher librarian and subject teachers too. I’m now actively giving talk on Information Literacy to schools. Can i use your write up and interpret it in simpler way and using my language ie Bahasa Melayu. I always share it on my FB Pages Literasi Maklumat – Malay version of Information Literacy.
Regards,
Norhayati Razali
Great article! If I could recommend one more possible source for Creative Commons/free to use pictures that might make this post an even bigger resource, it would be https://pikwizard.com
Have you tied Unsplash. I might have learned about here or on my twitter PLN. It is free as long as you credit the individual as mentioned above. They are images shared by photographers from around the world.
https://unsplash.com/
Thanks, Jennifer! For several years now, we’ve been teaching students what how images are, and are not, tagged for free use and how to attribute them, in particular when publishing to their blogs. It’s great to see your succinct and informative presentation of appropriate use, credit, and format. Interestingly but not surprisingly, students who incorporate this into their practice influence teachers who do not yet.
Hi Jennifer,
I really appreciate your message on properly using images, especially when to give credit (important foundation) and resources (meaningful application) available. As I reached the section on citation I wondered why not use MLA format? I advocate for proper use and credit in and out of the classroom and want to be sure I am aware of best practices.
Thank you!
Stephanie
Hey Stephanie,
I agree that this is an important topic for teachers to go over with their students, both in terms of foundational knowledge (why we do it) and application (how we do it). I think the answer to your question comes down to the difference between citation and attribution. For a good comparison of the two, see here. The MLA format, as you mention, is one option for citation that’s used mainly in academic settings. Attribution, on the other hand, is used mainly for legal purposes, which is what Jenn is focusing on here in her post. Neither one is better than the other; it just depends on what your purpose is.
Hi Jen,
So helpful, as always, this is a great resource, thanks so much. Such an important topic, and one I want to broach soon with my staff, so this is perfect (I’m a teacher librarian so it falls into my area of responsibility).
Thought it might be worth mentioning that teachers should be aware that each country has its own copyright laws, with the link to copyrightlaws.com only relevant for US teachers. Here in Australia we have our own laws and there are different laws again for schools, I presume other countries are similar.
But of course the principles are the same, I love all the various ways you have suggested to avoid violating copyright. Brilliant!
A great resource, many thanks!
This is a great resource and good reminders.
Thanks so much!
Great ideas
I think students need to understand how to use images properly, and to have fun.
I agree with authentic teaching to be most effective. Why not teach from the elementary level the legal and illegal use of images?
As an elementary teacher, I absolutely think this can get started with younger kids.
I agree, Debbie. I think the earlier students learn these the better.
It all makes sense.
I was just referred to this article/blog and found it to be VERY useful and informative. As a secondary school educator I feel there is not enough emphasis put on the ethics of using the internet – basically becoming a free-for-all take what ever you can get a hold of – forgetting the effort it took to create much of what the internet contains.
Hats off to a job well done Jennifer.
Paul,
Thank you so much for sharing this positive feedback. It’s so good to hear that as a secondary educator you are finding value in Cult of Pedagogy. Let us know if you have any questions or need help finding a resource.
Katrice
I really appreciate all of the great advice regarding teaching students the legal and proper way to select images. I also loved your idea of having students draw their own images and to post them on Pixaby or other sites like PicMonkey. How exciting for students to see their creations posted on a Pic website to be seen and used by others.
Hey! I have a quick question as this has been a source of discourse in some of my studies.
How does the Fair Use policy come into account, in the specific case of private research within study? It is my understanding that this means we do not need to cite copyright or get permission from the image owner. Especially in the case of high-level tertiary study, it can be INCREDIBLY difficult to find scientific diagrams or anatomically correct images on free stock sites. For example, I recently did a research paper on chronic kidney disease in canines, and we had to use images under the fair use policy, as that level of image does not exist for free. This level of research isn’t exactly ‘fun’ either haha!
I understand what you’re going for, but one of our lecturers is determined that we only use free images, even though my institution does not have any rules around using images under the fair use policy, which makes high-level research reports nigh on impossible. They have used this blog to tell us why we must only use free images.
At a secondary level of teaching, I understand what you’re going for and support it, as I’m sure many high school (or younger) students do not understand referencing and copyright laws, I’m just frustrated by being restricted at a higher level of learning.
I would love to hear your thoughts!
Hi there! Really good question, and I’ll be up front about the fact that my knowledge of fair use standards does not run deep. I think a good rule of thumb to follow is if you’re not going to make money from the use of the image, attitudes toward use become much more lenient. As you suggested in your comment, my article is geared toward helping K-12 students break the habit of just grabbing any old image off the internet and sticking it into their own creations; even though their work is not likely to have an audience outside the school building and will therefore not be likely to get the attention of anyone seeking to nail them with copyright infringement, if they never learn the right way to do it, they will take those bad habits into their adult lives, where the consequences could be far more serious.
With all of that said, I’m not quite sure what your options are. I wonder if you could create your own images by using a tool like EasyAnatomy and doing screenshots when you get just the right image you need, then crediting the site as the source. I looked at their FAQs and I’m not sure what the legality of that might be, but it seems like it might be an avenue worth exploring. Outside of that, you might try networking with other students in your field (through something like a Reddit discussion or Facebook group) to look for solutions others have already found.
I hope this helps!!
Hey Jennifer,
Thanks for your feedback, that’s awesome. I’ll definitely check out that anatomy app! Creating our own images is definitely viable, just tricky to do without high levels of artistic ability so an app like that might just be perfect!
I appreciate the thought and for taking the time to reply. 🙂
Many thanks! For the first time, I’m attempting to create something. I was under the idea that most internet pictures were protected and that this discovered me to produce photographs from them! https://pathedits.com/blogs/tips/100-places-to-find-free-stock-photos-for-your-website-and-social-media
This resource provides an invaluable guide to help students cultivate a culture that not only gives credit where it is due but also encourages accountability. Irrespective of a person’s background, cultural disposition worldview, or environmentally conditional influences, originality when well modeled will always be chosen over mediocrity.
Helping my students own their material, giving credit to who it is due grows ethically driven professionals and citizens.