
Listen to this post as a podcast:
Sponsored by Learners Edge and ViewSonic
This page contains Bookshop.org links. When you make a purchase through these links, Cult of Pedagogy gets a small percentage of the sale at no extra cost to you. What’s the difference between Amazon and Bookshop.org?
OK, look. We need to have a talk. A lot of you are out there giving lectures, presentations, and workshops, and your slideshows need work. Maybe not all of them, but definitely most. I thought I got the message out there a few years ago when I urged people to read Presentation Zen, the book that forever changed my own slideshows. But I didn’t have much of an audience back then, and since that time I’ve seen far too many PowerPoints and other slideshow presentations that still appear to be suffering from some very fixable problems.
So I’m going back in. I’ve put together a list of seven things you can do to make your slideshows better. A lot better. Here we go.
1. Put it in Presentation Mode (please!!)
I can’t count the number of times I’ve sat down to listen to a presentation, and watched in horror as the presenter simply scrolled through the slides while still in editing mode, where the featured slide takes up about half the screen, the thumbnails of the other slides are visible on the left, and the editing toolbar is still visible across the top. No no no no nooooo!!!

In both PowerPoint and Google Slides, there’s a button you can click to put your slide deck in presentation mode, where the entire screen is filled with just one slide and the animations work as they are supposed to. Doing this gives the audience a rich, full-screen experience with each slide, one at a time, which is much more pleasing than looking at the back end of it all.

To find presentation mode in PowerPoint, click Slide Show on the top menu, then choose From Beginning or From Current Slide. In Google Slides, go to the top right and look for the Present button. From there, you’ll have several options for putting your slideshow in fullscreen mode.
2. Cut Way Back on Your Text
Slides are meant to supplement and enhance your presentation, to provide visual interest and add new dimensions to your message. If your presentation is going to be memorable, the audience should get something from both you AND the slides. The slides themselves shouldn’t BE the presentation.
This seems like common sense, but somehow we have arrived at a place where many, many presenters use the slideshow to deliver the whole presentation: They put ALL the information on the slides and assign themselves the role of simply dictating that information to the audience. Once your audience realizes this is what you’re going to do for every slide, they immediately start looking for ways to occupy their brains for the foreseeable future.
I can hear your protests now: But I have information to give my audience! If it’s not on the slide, they may not remember it. Even more importantly, I MIGHT NOT REMEMBER IT EITHER!
Not to worry. Here are some specific ways you can pull text OFF of your slides while still giving the exact same amount of information to your audience:
Shorten Your Bullet Points
Instead of writing long sentences or phrases on your slides, try sticking to just short phrases. Then use the notes panel to script out what you’re going to actually say. You can either print out the notes and keep the printout nearby while you present, or when you put your slideshow in presentation mode, you should be able to set it up so that you can see the notes panel, but your audience can’t, allowing you to follow the script without reading directly off the slides. Ideally, if you have rehearsed your presentation enough, you should be able to do this without really reading the notes verbatim.

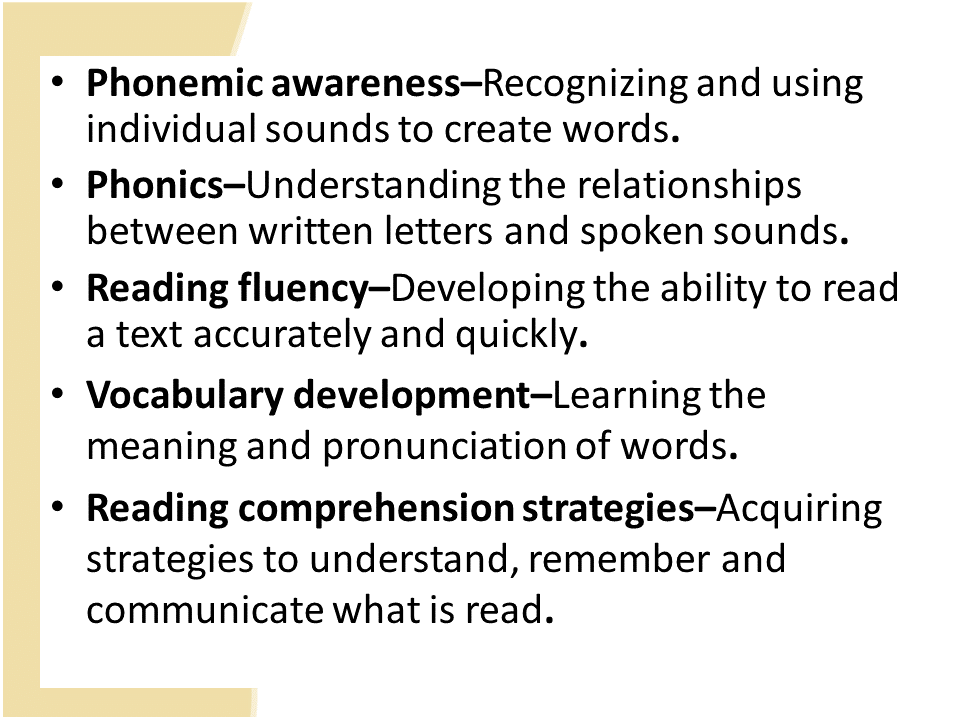
The presenter can simply explain the definitions, then include them in a handout.
Make More Slides
Take one slide that has a lot of information and spread that text over several slides, rather than cramming it all together on one. In other words, instead of one slide that has five bullet points, create a whole section of your presentation that has five different slides, each of which illustrates a separate item from that original bulleted list.
Create a Handout
Many presenters and instructors want to put lots of information on their slides so they can provide those slides to students or audience members after the presentation, for reference. This is a recipe for awful slides. If you want your audience to be able to access your content later, provide a handout that summarizes your main points. The handout could also be provided right along with your presentation, as it would help English learners, students with hearing difficulties, and others follow along better.
This handout can be in paper or digital form. A PDF works well for this purpose, because it can be opened on most devices, regardless of platform.
To distribute a PDF handout, store it on a cloud-based platform like Google Drive or Dropbox, create a sharing link to the file, then shorten that link with a site like Bitly, put the link inside a QR code, or both, and provide these to your audience after the presentation so they can grab the handout for themselves.
3. Update Your Assets
One of the simplest ways to improve your slideshows is to update outdated artwork and fonts.

in the history of fonts. But there’s more to know about Comic Sans—see below.
- Fonts. You can literally download thousands of fonts for free from sites like dafont and install them right into PowerPoint. If you’re using Google Slides, you can choose from the nearly 1,000 fonts Google has licensed for use in G Suite tools. But don’t go crazy: Only use the fun, decorative fonts for things like titles. Stick to simpler, easier-to-read fonts for headings and body text. This article from Visual Hackers offers a detailed overview of choosing fonts for presentations.
A note on making slides more accessible for people with disabilities: Comic Sans, the font used in the above slide, has been widely criticized for its outdated look, but it also happens to be one of the most readable fonts for people with dyslexia, so you may choose to keep it for that reason, or switch to another more readable font. It is also recommended that you use 40+ font size for titles and 20+ for main text. Learn more about making slideshows more readable here.

- Artwork. The clip art that so many of us used in the past is really starting to look out of date. Now we have so many free visuals available to us online. I recommend you either go with free stock photos from sites like Pixabay or Unsplash, or simple icons that can be found right inside PowerPoint or added into Google Slides with an add-on like Insert Icons for Slides. If you go searching online for images, be sure to educate yourself about the legal and ethical use of images you find online.
4. Create Previews and Signposts
It’s difficult to sit through a presentation when you really have no idea how long it’s going to be or how many major points are going to be covered. If you let your audience know they are in the capable hands of a presenter who has put together a well-organized presentation, they’ll be able to relax and concentrate on your message.

You can accomplish this by offering a preview of your presentation at the beginning. This can be a simple slide that lists the major topics you’re going to cover. Then, as you move through the presentation, update them by returning to that list and showing them where you are.
5. Go Light on the Animations
Most tools offer huge collections of animations you can use in your slideshows: You can have bullet points explode onto your slides, bring a picture in with a slow, dramatic spin, and fade from one slide to the next with a checkerboard effect. It’s all really neat-o.
Unfortunately, for your audience it gets old pretty fast. Ideally, they should be focused on your words, not on the way those words bounce onto the screen. So when it comes to animations, less is definitely more.
I have found that the most effective use of animations is to “build” slides that contain several elements. For example, if you have a slide that contains several bullet points or images, and you plan to talk about each one separately, set up your animations so that each item only appears when you’re ready to talk about it, triggered by a click of your mouse or a presenter’s remote (this is the one I’ve used for years now). Doing this keeps your audience from reading ahead so they can focus only on the point you’re currently talking about. A simple choice like “appear” or “fade” in PowerPoint does the trick nicely for this type of animation.
6. Keep Things Consistent
Within each slide and from slide to slide, do whatever you can to keep your elements consistent. Doing so will make your presentation look much more professional, which will give you more confidence as a speaker and will give your audience a lot more confidence in you.
- Fonts: Stick with one style for your headings and one for your body text. You could do a third for your more decorative elements, like large titles or divider pages. Ideally, these elements will be the same size from page to page.
- Colors: Choose just a few colors for your slideshow and keep them the same throughout.
- Other design elements: If you are using photographs, try to go with similar styles throughout the presentation. If you’re using icons, use other icons of similar colors on multiple slides.
7. Proofread…Out Loud
This is one of the hardest things to make yourself do, but it is probably the thing that will make the biggest difference: Go through your slides and read them out loud. No, reading it carefully in your head is not the same. Do it out loud. I promise you will catch at least one error.
This is not the same as practicing your presentation; that you should definitely do multiple times if you want to do a good job in front of an audience. But if you really want to catch those embarrassing spelling, punctuation, and other mechanical errors, the only way to find them is to read your slides out loud.
Need Some Fresh Templates?
I have just created a set of four slideshow templates that you might want to get for yourself. They’re available in PowerPoint for Windows and Google Slides. Each one contains 27 different slide designs, and they also come with a separate template for a 2-page handout, styled to look similar to the slideshow, so you can create a PDF to accompany your presentation.
The templates also come with a collection of video tutorials that show you exactly how to customize them for your use. Click on each design below to preview the whole template, or scroll to the bottom to get the bundle of all four designs at a discount!


Join our mailing list and get weekly tips, tools, and inspiration that will make your teaching more effective and fun. You’ll get access to our members-only library of free downloads, including 20 Ways to Cut Your Grading Time in Half, the e-booklet that has helped thousands of teachers save time on grading. Over 50,000 teachers have already joined—come on in.


Thanks for these tips. Always find your posts insightful and helpful. Have you ever seen David Phillips Ted talk on avoiding death by PowerPoint? Also really good.
https://youtu.be/Iwpi1Lm6dFo
These are great tips! Has anyone ever used Nearpod as a way of creating an interactive presentation with students? I am interested to learn more about it. If you have any tips or comments, I’d love to know!
While I agree with everything in your post, this is great advice for when people are giving presentations on a topic that is not meant for a classroom full of adult learners. After reading much about the science of learning, I have stopped using PowerPoints in my classes and
I make my adult Learners take notes by hand. They pay more attention. And I find more engagement with this method along with other things I have been using. Seattle Learners I am teaching in a diploma program are very used to passive learning they just sit there and listen or read or doodle on the computer and learning is not taking place. Having them sit up take notes, fill out documents, work in pairs or groups, this process is much better for my classroom environment.
Cynthia
I am not getting rid of PPT, just not using it for now.
In general, many of the above tips can be followed, however, when working with learners for whom English is not their first language and/or learners with specific learning disabilities, some of the advice is downright cringy.
For example, students who may have hearing difficulties or struggle with English comprehension prefer having text they can read on a slide to help them follow the lecture. If you decide not to have it on a slide, give all students a handout immediately so they can read along as you lecture. I understand seeing the terrible slides with full paragraphs but listing a number of definitions as you did seems fine.
Additionally, Comic Sans, while hated by the general public for some reason, is actually the most legible of general fonts for people with dyslexia. If you refuse to use Comic Sans, don’t use whatever font was used on the Self-Selected Reading slide, which used a serif font, which is least legible for people with dyslexia and other learning disabilities (https://www.dyslexicadvantage.org/the-best-fonts-for-dyslexia/).
Lastly, for disability-friendly slides: Use 40+ size font for Titles and 20+ for main text.
Charlotte, thank you for sharing your perspective. The points Jenn addresses in this post can be applied to a variety of contexts and will generally go a long way in helping presenters improve their slides. However, I think that having good slides starts with knowing your audience. As a teacher, you know your students best and are able to adapt your slides to meet their specific needs. In the past, I’ve used Comic Sans on slides so that my pre-literate adult ELL students could access content through a readable font. I might choose a more attractive font in a different context to make my slides more engaging. Whatever you chose to do, I think it’s important that you are thoughtful and have a reason behind it. Oftentimes, teachers don’t have the time to think about putting together effective slides that appropriately engage their audience, and this is where the tips that Jenn is offering are intended to help. I would also add that in the classroom, using slides are only one support for teaching students. ELL students, for example, would benefit from the use of graphic organizers, discussion strategies, and other visual supports rather than having to rely solely on “overcrowded” slides.
Charlotte, thank you for pointing this out. We are in the process of updating our content to make it more inclusive, and while I should have done this when you originally commented, I have revised the post now to incorporate this information.
Jennifer, you mention Perdeck or something like this, connected to interactive slideshows, at the start of your April 14, 2019 podcast episode. Can you spell this for me? Thank you!
Hi Kimberly,
Yes! It’s Peardeck. You can find more information here!
Hi again! I got it! I heard you mention it again and tried Pair Deck and then saw it’s Pear Deck! Haha!
Perhaps when you give website addresses, you could quickly spell them out, especially when homonyms are involved. 🤣
Ps. Thank you for your amazing and super practical work!. In my 14th year of classroom teaching now, I reflected recently on how I’ve found mentors in you and Angela Watson over the past two years. Not what I expected of a mentor (due to the virtual and one-way nature of the relationship), but so, so grateful to have found you both. Thank you for sharing your gifts, experience, knowledge, insights and so many great leads to others’ excellent work, including research and tools.
Kimberly,
Thank you so much for sharing such positive feedback about Cult of Pedagogy. It’s awesome to have a mentor that can help you learn and grow so much as an experienced educator. I’ll be sure to share this with Jenn; I know she’ll want to see it!
I was just wondering if anyone had luck with google slides regarding the ability to see your slide notes on your chromebook while your audience just sees your presentation. The directions did not work for me, and I even did an internet search. Maybe this only works in powerpoint.
I was just about to teach my undergraduate students “the do’s and don’t” with slideshows when came your podcast! Nice advices! Thanks a lot for these tips, I’ll share them.
Stéphane, somewhere in France
Glad this was helpful, Stephane!
Love this concise review of improving PowerPoint presentations. I have never heard of Unsplash and look forward to reviewing that site for potential inclusion into my future slide shows. Shared via LinkedIn for my other education colleagues. Thank you so much!
Glad you found this helpful, Kimberly. Thanks for sharing!
Jennifer,
Thank you for you power point tips. I have began using Peardeck to help with student engagement when using slides. Using the same tips you have given and integrating the google slides add-on “Peardeck” makes note taking or presentations less dull and draining.
As if your templates weren’t enough, highly recommend http://www.slidescarnival.com for about 50+ PowerPoint or Google Slides templates that are awesome and free for use. Take a look!
Thanks for sharing Bill. I love Slides Carnival. The templates are great and the sample slides even include tips on how to have better presentations, many of which align with what Jenn is saying here. Be sure to choose the right template for your audience. There are a wide variety available.
Thanks, Jennifer. I wonder how you (and others) feel about the Presenter View in Google Slides. I prefer it because I often will be moving between different tabs in presentations to model a task or show examples on websites. This view allows that to occur smoothly but leaves the URL and tab bar visible up top. People I’ve asked said it doesn’t bother them, but I thought I’d seek a broader perspective.
Hi Craig! The presenter view in Slides is definitely better than keeping it in editing mode, and I definitely understand the need to jump between tabs to demonstrate different things. I think my main beef was with keeping it in editing mode with the thumbnails and tools still visible!
Hi Jennifer,
Long time listener, first time posting – I used to do some graphic design before getting into teaching, and I have to say I support these ideas 100%! I feel like a lot of teachers don’t want to spend time designing slides because either (a) they’re under the impression that those who do “just want to make them look cute” (and yes, over-cutesifying presentations is another issue/the other extreme, in my opinion) or (b) they just don’t know how to.
But like you said, good design so, SO important! I put a lot of effort into making my slideshows reader-friendly and supportive of students’ various needs, whether it’s for ELs, audio/visual-impaired learners, etc. Something I just recently started thinking about was how I could make my slideshows more colorblind-friendly, too. So much to consider! Anyhow, love your tips and your blog in general 🙂 Also, I’d add Curlz and Papyrus to your list of fonts that need to just stop.
This a great post and reminder to many, especially our students. Upper elementary students like to include a lot of text and then read it aloud to the audience. I’m trying to steer them away from this and keep the text short. Thank you!
Thank you for an excellent post (which Pinterest just put into my feed). I almost jumped out of my chair when I read what you wrote about presentation mode! Why is that so hard for people to grasp? It’s a presentation; put it into presentation mode!
Another thing that disturbs me is how many people have obviously not practiced the speech to go along with the visuals. I teach my students to mentally use the children’s song “Head and Shoulders” as a kind of template. They laugh and then I let them know I use that, although I personall do not like the song. Here is how I explain it.
Head = the presenter knows what they are saying. (Yes, that means learn it and practice it; do not try to wing it.)
Shoulders = keep ones arms below shoulder level. Otherwise, you risk looking like you are trying to fly away.
Knees and toes = legs–use them! Walk around the room; interact with your audience; do not hide behind the lectern.
Eyes = eyes (don’t laugh!) Make eye contact with your audience. Do not stare unblinkingly at one audience member of course, but while walking around, look at the people!
Ears = listen! Listen to the sounds in the room. Is there a lot of chatter which would indicate you are losing their interest?
Mouth = speak! Do not speak too quitely or too loudly.
For the next part, I point at my nose, ask what it is and when the students respond “Nose”, I ask them how it’s spelled. They always say “n, o, s, e”. I tell them, “Not this time; we’re going to cheat a little bit. We’re going to spell it ‘k, n, o, w, s'”. I ask them why I would do that? Not every class, but in very many classes I’ve taught, at least one person shouts, “It takes us back to knowing!”
Thanks for sharing this, William!
Finally someone said it! I cannot stand slides that look like a textbook. I was, however, unaware that there has been a way to present my slides to an audience while still privately viewing the speaker notes on my personal screen. I will definitely be using this for presentations moving forward. Also cant wait try Pixabay and Unsplash for icons.
Great to hear you’re trying out some new tools, Emily! Best of luck!