
Listen to this post as a podcast:
Sponsored by Write About and Peergrade
Some of our most powerful instructional tools have been hanging around forever, just waiting for us to notice them.
One of those tools is the graphic organizer. It’s so simple—just a few shapes and lines, nothing fabulous, no bells or whistles—and yet beneath its simplicity lies an absolute dynamo, a vehicle that can cement learning more firmly than a lot of the other stuff we try, in a lot less time.
Let’s look at why graphic organizers are so powerful, explore some ways to use them that you may not have tried, and consider a few important tips for using them with the greatest impact.

Why Graphic Organizers Work So Well
According to Allan Paivio’s theory of dual coding, humans process information in both visual and verbal form. When we see the word “book,” we picture a book in our minds, because we’ve had plenty of real-life experiences with books. When we’re learning new words or concepts, it’s helpful to try to form mental images for those ideas to reinforce their meanings.
While some approaches like doodling and the mind’s eye strategy apply this theory by having learners create physical and mental pictures of concepts, a graphic organizer keeps the words, but arranges them on a page visually so we better understand how concepts are related. Decades of research with various age groups and in different content areas has shown that in general, when graphic organizers are incorporated into instruction, student learning improves (Hall & Strangman, 2002).
Graphic organizers also help us meet the needs of all learners. Presenting information in both text and graphic formats is one of the most basic ways to make a lesson accessible to more students—the basis of Universal Design for Learning—and graphic organizers definitely fit the bill there. In fact, much of the research on graphic organizers has focused on how powerfully they can impact the learning of students with learning disabilities and special needs (Dexter, Park, & Hughes, 2011; Douglas, Ayres, Langone, & Bramlett, 2011).

10 Uses for Graphic Organizers
1. Note Taking
Have students use graphic organizers to take notes on their reading, when doing research, while watching a film, or while listening to a podcast. If you are already familiar with the content and how it’s structured, you might choose or design an organizer ahead of time for students, which research says can be more effective and efficient than having students create their own. (See the Tips section below for more information on this.)
2. Lecture Support
Instead of giving a lecture with a standard PowerPoint or an outline, present your content in a graphic organizer. This will instantly give students a way to visualize how the concepts are related to each other. If students ever give their own presentations, have them try using graphic organizers to present their information.
3. Pre-Writing
Having students use graphic organizers to plan and structure their ideas before putting them into a draft is a common practice in English language arts classes. If you’ve never tried it, it’s worth adding this into your writing process, especially if you teach a content area where writing isn’t a regular part of student work. A warning: Do not treat the organizers as the writing piece; have students just jot notes down in these, rather than complete sentences. The bulk of student writing time should be spent actually drafting their piece.
4. Text Illustrations
When students do expository or argumentative writing, consider having them add a graphic organizer to their finished product to illustrate a concept in their piece. In this case, the organizer would NOT be a pre-writing tool, but a supportive diagram to aid in their own readers’ comprehension. This may not work for all topics, but if a student is writing about how bees make honey, for example, a diagram that shows the process from flower to honey would go a lot further to help the reader understand than a downloaded image of a bee hovering over a flower. As students create diagrams to support their own texts, they will be more likely to pay attention to those that appear in the texts they read.
5. Pre-Reading
As students get older and are faced with more challenging texts, especially in content areas outside of English language arts, their comprehension gets a considerable boost if they are trained to identify the text structure prior to reading (Baxter & Reddy, 2007, p. 23). Some common text structures are compare and contrast, description, problem-solution, cause and effect, and sequence of events. Once the structure has been identified, students can complete a supporting graphic organizer while they read and fill in the components as they encounter them.
Another pre-reading graphic organizer is the KWL chart, which helps activate prior knowledge before reading and primes students to read with a purpose. KWL charts can work for any age group and can be used for single texts or at the beginning, middle, and end of an entire unit.
To read a comprehensive overview of research on graphic organizers as a reading strategy, see Manoli & Papadopoulou, 2012.
6. Assessment
Instead of assessing student learning with a quiz, try having students complete a graphic organizer that shows the relationships between various terms or concepts, or use this type of activity as one question on a quiz or assessment. Although this will not work for all content, it might be just right for evaluating whether a student understands the bigger picture of a body of content.
7. Thinking Tools
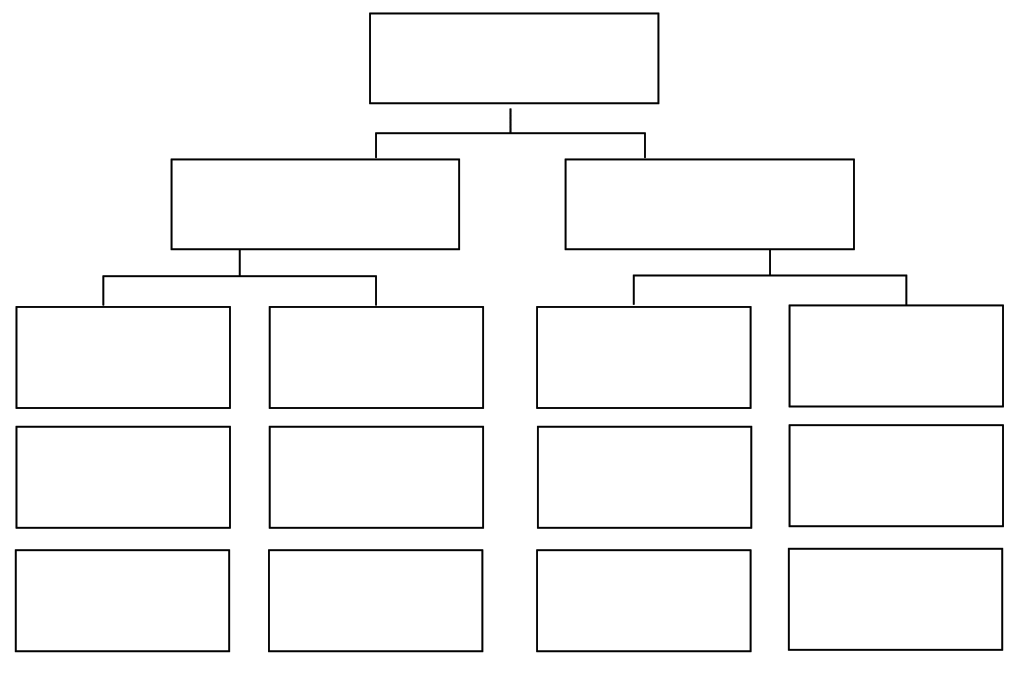
When we deliver content to students through lecture, readings, or video, our next step should be to have students interact with the content in some way. This can be accomplished with class discussions, lab work, or project-based learning. Another simple class activity that gives students a chance to grapple with the content is completing a graphic organizer: In groups, pairs, or even on their own, have students organize chunks of the content into graphic organizers, then compare their results to other groups. For example, if a foreign language class is studying vocabulary words for food, they could use a hierarchical organizer (like the one shown above) to organize “food” words into smaller groups, like meats, fruits, vegetables, and so on. This kind of sorting gives them more interaction with the terms and helps them work with similarities and differences, another powerful instructional strategy.
8. Unit Planning
When introducing a unit to students, show them how the parts of the unit fit together with a graphic organizer. Not only will this give them a sense of where you are in the unit at any given time, it should also help them understand why they are learning the individual parts. Bonus: Doing this exercise yourself could help you decide what concepts are most important for students to learn, and identify other things that may be “nice to know,” but aren’t necessarily vital to student understanding.
9. Classroom Management
Too often we hear “management” and think of dealing with problems, but a huge part of effectively managing a classroom is making your policies, procedures, and expectations crystal clear. Teachers often make signs listing class rules and procedures in writing, but putting the most important ones into graphic form will increase the likelihood that students will follow them.
10. Retrieval Practice
Just recently we covered the power of retrieval practice to help students learn and retain information more effectively. One retrieval practice technique is called a Brain Dump, where students try to recall as much as they can about a given topic, without the aid of any supporting texts. After doing the dump, students are then allowed to check their texts to confirm, correct, or add to the information they retrieved. But if we added a step—having students sort their dumped information into some kind of graphic organizer, possibly even working in pairs to do so—then have them go to the text, it could further solidify the benefit of the retrieval and help them get very clear on where they have gaps in their knowledge.
Tips for Using Graphic Organizers Effectively
- Model how to use the organizers.
If students aren’t taught how to use graphic organizers through teacher modeling and guided practice, they won’t get much from them. So take the extra step and model their use. - Avoid complete sentences.
Unless you have a very good reason to insist that students use complete sentences on their organizers, don’t do it. Complete sentences take up too much space, they take longer to write, and the effort to hold students accountable misses the whole point of the organizer. Show students how to use bullet points and sentence fragments to get ideas down and show how they are related. - For complex material, consider teacher-generated organizers.
In a 2007 study, students who were presented with author-created graphic organizers along with reading materials produced evidence of deeper learning in less time than those who had to produce their own graphic organizers (Stull & Mayer, 2007). When you present these to students, consider filling them only partially and having students complete the rest; this has been shown to help students recall information more effectively and teach them how to take graphic organizer notes on their own (Robinson et al., 2006). - Let students color outside the lines. Literally.
As sketchnotes grow in popularity, educators are starting to recognize the power of doodling as a learning tool. Graphic organizers can be enhanced with small doodles and other notes that fall outside the basic structure of the organizer. As long as the student can still see the original structure and the drawings make sense to him or her, these “enhanced” organizers can reinforce concepts even more deeply. - Offer a variety of organizers for day-to-day use.
Once students become familiar with a certain type of organizer, they may find other uses for it that you haven’t even thought of. If you make these available to them in the same way that you might provide dictionaries or pencil sharpeners, you might find that students start using them even when they haven’t been assigned.
Want Them Ready-Made?
My Graphic Organizer Multi-Pack contains 15 beautiful designs, all done on editable PowerPoints and Google Slides, so you can customize them to suit your needs. The pack also includes video tutorials that show you exactly HOW to customize them. Click here to get a pack for your classroom!

References:
Baxter, S., & Reddy, L. (2007). What content-area teachers should know about adolescent literacy. National Institute for Literacy. Retrieved from https://lincs.ed.gov/publications/pdf/adolescent_literacy07.pdf. PDF
Dexter, D. D., Park, Y. J., & Hughes, C. A. (2011). A meta‐analytic review of graphic organizers and science instruction for adolescents with learning disabilities: Implications for the intermediate and secondary science classroom. Learning Disabilities Research & Practice, 26(4), 204-213. PDF
Douglas, K. H., Ayres, K. M., Langone, J., & Bramlett, V. B. (2011). The effectiveness of electronic text and pictorial graphic organizers to improve comprehension related to functional skills. Journal of Special Education Technology, 26(1), 43-56. PDF
Hall, T., & Strangman, N. (2002). Graphic organizers. Wakefield, MA: National Center on Accessing the General Curriculum. Retrieved March 20, 2009. PDF
Manoli, P., & Papadopoulou, M. (2012). Graphic organizers as a reading strategy: Research findings and issues. Creative education, 3(03), 348. PDF
Robinson, D. H., Katayama, A. D., Beth, A., Odom, S., Hsieh, Y. P., & Vanderveen, A. (2006). Increasing text comprehension and graphic note taking using a partial graphic organizer. The Journal of Educational Research, 100(2), 103-111. PDF
Stull, A. T., & Mayer, R. E. (2007). Learning by doing versus learning by viewing: Three experimental comparisons of learner-generated versus author-provided graphic organizers. Journal of Educational Psychology, 99(4), 808. PDF
Join my mailing list and get weekly tips, tools, and inspiration—in quick, bite-sized packages—all geared toward making your teaching more effective and fun. You’ll get access to my members-only library of free downloads, including 20 Ways to Cut Your Grading Time in Half the e-booklet that has helped thousands of teachers save time on grading. Come on in!!


Hi! I’m very interested in using graphic organizers in my classroom. Does this approach work well in a high school science classroom?
High school science would be a perfect place for graphic organizers! I would suggest starting with uses #2 and #7 if you haven’t used them with students before, but really, all ten would work great in high school science, so dive in!
Hi Chelsea and Jennifer, I teach secondary school science in the UK and love using graphic organisers to help the students make notes, understand the links between different things and make comparisons. e.g. we used Venn diagrams in Year 7 (age 11/12) recently to compare two different specialised cells; and a spider web style organiser to summarise structure and properties of small covalent molecules. Sometimes I prepare graphic organisers with prompts or questions in boxes to help the students complete them ‘independently’. Thank you for your work Jennifer, I love reading your posts, and can’t wait to try out your suggestions in the classroom!
I love your work! I work with new teachers and you have simplified the how and clarified the why. I recommend your work to everyone. I recently shared your Single-Point rubric at a state meeting. Thank you!
Hey Jenn,
Another graphic organizer tool for students to use is SmartArt in MS Word or PowerPoint. These are simple shapes preset in various arrangements, but the power is the outline pane that allows you to easily increase or decrease the number of shapes. It’s great in the context of your article because there is not a preset number of “boxes” to fill in. While the teacher can determine which SmartArt arrangement to use, this allows the student to decide how many to make use of.
Thanks for the article! I especially like the idea of using a Graphic Organizer as an assessment tool. I plan to try that this week.
I’ve started to refer to your weekly topic often in my department meetings. It’s proven to be a great way to start an awesome discussion!
–jeff
Jennifer,
Thanks for posting this! I love graphic organizers and this is a wonderful resource.
I wonder if you have come across David Hyerle’s Thinking Maps in your research on GAs? Here are a couple of links, if you haven’t. I think Hyerle has come up with something really powerful.
http://www.thinkingfoundation.org/
http://www.thebalancebetween.com/
Hyerle also has several books in print.
I have no connection with Hyerle, just a big fan.
Thanks so much for these links, James. I have been referred to Thinking Maps over and over, and they seem wonderful. I have to admit, it’s been frustrating, because it’s like standing outside a beautiful store I can’t go into. Everything I’ve read about Thinking Maps indicates that the only way to learn about them is through an in-school training, and since I am no longer in the classroom, I can’t take advantage of that. I really wish they had some kind of online resources for people outside of school systems to learn. I would imagine homeschoolers must feel the same frustration! If you’re aware of how an ordinary Joe like myself can learn more, I’d love to take advantage of it. Thanks.
I’m not a teacher in a classroom, but I’ve started drawing mindmaps in organizing my always racing brain. It really helps to see my ideas laid out in picture form in a nice, logical flowchart. I can see how this technique would be invaluable in the classroom. Thanks for sharing!
Hi Jennifer! I’ve recently discovered your podcast and, as an instructional coach, have taken away great ideas/research to share with my teachers! Looking at your collection of graphic organizers on TPT, I noticed they are recommended for grades 6+. What’s the most effective way to use graphic organizers with elementary school kids? I’ve used them in the past, but always love when I can find research to back it up.
Hi, LeeAnn!
I work for Cult of Pedagogy, and also taught at the elementary level for many years. It’s funny because I remember years ago when I kind of stopped using graphic organizers, because I just didn’t see them making much of an impact on student learning. In hindsight, I think it’s mostly because I really didn’t know how to use them with intention or with an end goal in mind. I needed to be more purposeful and direct with my teaching, helping kids understand how organizers are a tool that helps them plan their ideas, make connections, and see how concepts are related. I think I was using them just to use them, or maybe because some of them looked kinda cute. Now I’m back to graphic organizers with a whole new intention! As with any tool, and with at any age, I think as long as teachers are doing lots of modeling, direct teaching, and being really clear on how and why we use organizers, they’ll be effective. Circles, lines, words, doodles…even with the youngest of kids, are effective when used with intention. As a side note, although Jenn’s organizers say for grades 6+, I’ve used them with younger kids too. In addition to Jenn’s post, here are a few other resources that may interest you. I hope this helps! Teaching and Learning with Graphic Organizers and How to Use Graphic Organizers to Enhance Learning.
I look forward to using this tool in my Elementary classroom teaching. Thank you again.
Great resource!
Hi Jennifer, Thanks you for this great resource, and for all the great work you do in this space on the craft of teaching! I am a late-starter to the education sector but loving it!
Something that I would like more guidance in, and I think it is related to this area, is the issue of starting an extended response (essay).
A question I often get from students is how do I start the essay, to which my standard response (based on my “How to write an introduction” model: Thesis statement; Roadmap; Glimpse of my conclusion), is to use my classic Essay starter…”This essay offers a discussion / reflection / explanation on…” (This is how I actually used to begin all of my essays at University. I know – I’m just not very creative!). Other tips I would give my students is to use key words from the actual question provided, so that the language is correct, and that they address the question right away. I never suggest that they repeat the question.
I know there isn’t a simple formulaic response but if you can point me in the right direction I would be very grateful.
Kindest regards, Tivoli
Hi Tivoli,
I’m thinking that an inductive learning lesson could work really well with helping kids understand what goes into an effective introduction. See what you think!
I think this article is helpful and yet the irony is that there is no graphic organizer to show how this tool can be useful or how to develop them for your content. There are only lists and bullet ponits. Consider adding one?
This author reminded me of the power and effectiveness of graphic organizers in helping students organize, make meaning and see the connections to the items they are learning or thinking about.
This information was a great reminder on the power of GO’s!
I am a very visual person and so I like to use graphic organizers a lot. Good to know it can be beneficial for the students as well.
I teach highly gifted K2. I’m looking for a visual way to help my students (who may be smart, but don’t always like to write) organize their thoughts and get them onto paper (or digital doc)! Do you have suggestions?
Hi Evelyn,
If you haven’t already, take a look at the resources below and see what you think. They all offer a way for kids to visually organize and represent their thinking outside of the structure that graphic organizers typically provide.
Hexagonal Thinking: A Colorful Tool for Discussion
A Simple Trick for Success with One-Pagers
To Boost Higher-Order Thinking, Try Curation
Note-Taking: A Research Roundup
Dual Coding Strategy
Hope this helps!
These are so useful. I love using graphic organizers (not all fit every student). I love the jotting note part instead of using it as the whole paper!
Fantastic knowledge and reminders of how impactful graphic organizers can be for students to have as a resources to gather and collect their thoughts and ideas.
Great reminders.
This was such a great reminder of how powerful graphic organizers are. They are a simple tool with endless opportunities to enhance learning. I love the idea of having a student create a G.O. as a text illustration for a piece of writing that they do. This encourages reflection, metacognitive thinking, and deeper thinking.
We’re so glad you enjoyed the post, Erica!
What is more effective for grades 4-6, digital or paper graphic organizers. Same question for grades 6-8?
Hi Deb,
Now that we have so many amazing digital resources, it can feel like we need to incorporate them into our lessons all the time. Though there doesn’t seem to be a definitive answer in terms of one being more effective, teachers can still use both. Certain activities might make sense with one over the other, or if given a choice, students might demonstrate a preference. If you’re looking for ideas on making your lessons more tech-friendly, try 16 Ideas for Student Projects Using Google Docs, Slides, and Forms. And if you’re thinking about whether your tech tools are actually helping your students meet their learning goals, this article, Quality-Check Your Tech: 6 Strategies might be helpful as well.
My students have a tendency to want to use graphic organizers as a first draft rather than a list of ideas. Do you have a strategy for teaching how to put ideas into bullet points rather than going straight to sentence writing?
Felicia, if you haven’t already, check out the section Tips for Using Graphic Organizers Effectively at the end of this post. One simple, but effective, strategy for teaching students how to capture their ideas using bullet points is modeling and guided practice. For instance, you might consider creating a partially-generated graphic organizer to accompany a complex text. This would serve not only to scaffold the text itself, but also to provide guided practice for students in the use of graphic organizers. I hope this helps!
Very effective podcast & text.
So glad you enjoyed it, Kate!
Thank you!